


 Indeed, migrating a WordPress site is quite a task, especially if you are shifting from one hosting provider to another. This usually causes a combination of fear and anticipation because the process involves not only technical steps but also considerable investment in time and resources. Whether you are looking to improve your site's performance, reduce your hosting costs, or simply shift to a more reliable service, making the switch can open doors to a host of opportunities for your online presence.
The reasons for migration will be diverse from the need to have better features on security enhancements to a call for better support on customers. Maybe your present host is usually experiencing frequent downtimes, giving frustrating interruptions on service that really can negatively influence user experience as well as go down to hit your site's reputation. Or it may be so that your needs have outgrown the plan which your existing host offers and would require you seeking a provider capable of offering great scalability.
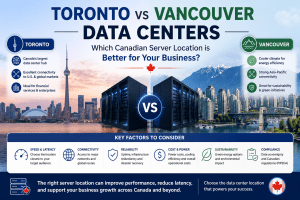
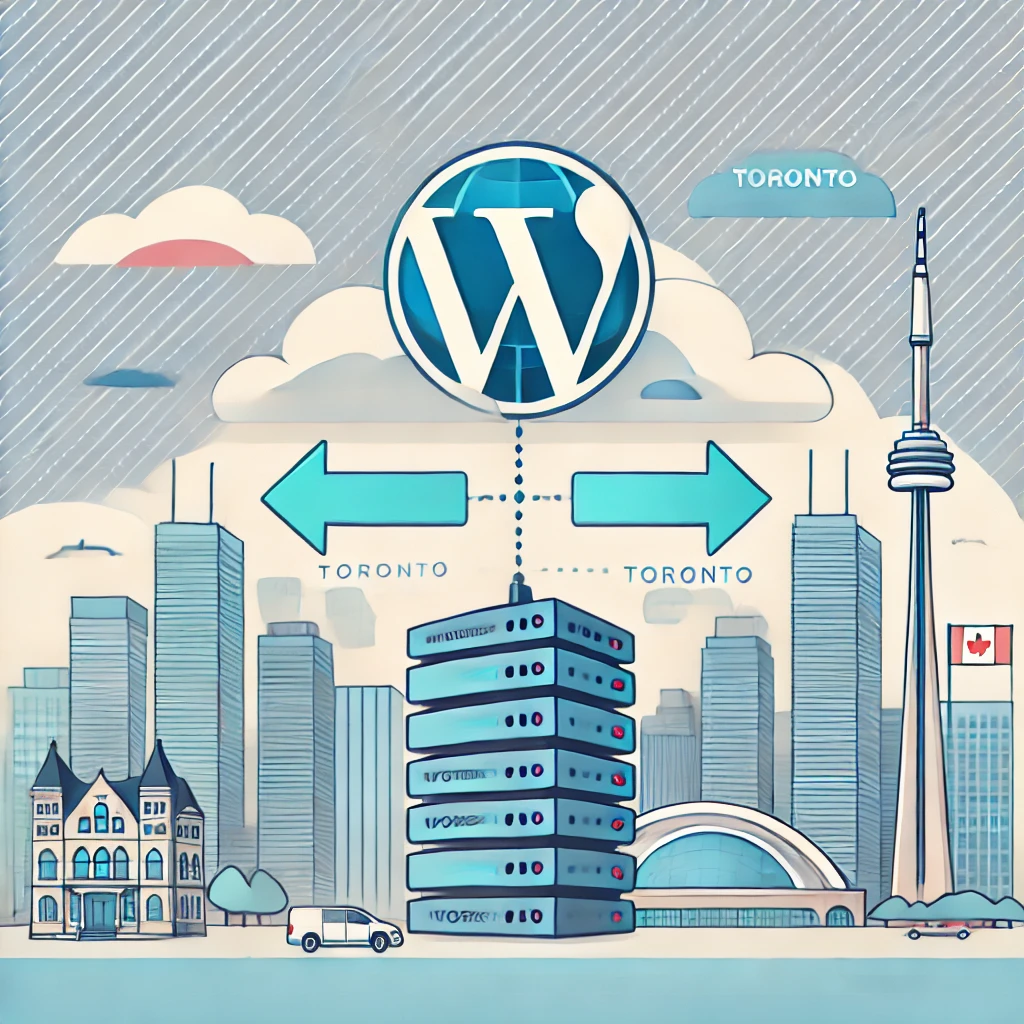
You are not alone if you are considering moving your WordPress site to a host in Toronto. More and more website owners realize the numerous benefits of using a local hosting provider, especially concerning performance, support, and SEO advantages. The data will also load faster for Canadian users due to lower latency, as it does not have to travel as far across the globe. Moreover, having a Toronto-based host means that you benefit from localized customer support. With a local provider like 4GoodHosting, a trusted provider of WordPress hosting solutions in Canada you can expect prompt, reliable support from a team that understands the unique challenges and needs of Canadian website owners. This assurance can alleviate some of the stress associated with migration and ongoing management of your hosting environment.
In this step-by-step guide, we will lead you through every process of transferring your WordPress site to a host based in Toronto. We'll detail each of the steps in transferring files and databases, from what you should do before the move to how to check everything works well on the new host. Knowing how to efficiently manage such a transition is key to reducing downtime and maintaining the integrity of your website through the process.
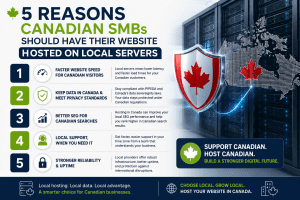
Why Host Locally
A local host, like Toronto WordPress hosting, is always your best choice due to several advantages suited to your geographical, technical, and business requirements. Here are a few good reasons why this makes for an intelligent choice:
Geographical Benefit
- Lower Latency: A local server for your website, say Toronto, keeps the server nearer to the viewers and minimizes latency for quick loading times.
- Increased Connectivity: A geographically aligned hosting service reduces the distance of data travel, which means that Canadian visitors will experience faster response rates.
- Localized Targeting: Hosting near your main market enhances the capability of your website to handle local traffic demand efficiently.
Better Website Performance
- Seamless User Experience: A Toronto-based host offers lightning-fast performance, which gives visitors quick-loading pages and smooth navigation.
- Improve engagement: The faster your site loads, the lower your bounce rate, the increased time, and better conversions - all greater for overall user satisfaction.
- Mobile-friendly optimization: Fast server response helps the mobile user - the more devices, the better.
Improved Search Engine Rankings
- SEO Advantages: Search engines, including Google, favor a closer server location, which means ranked more competitively for regional search queries.
- Greater Exposure: Local hosting raises your opportunity of being returned by location-specific searches, allowing local customers to easily find you.
- Faster Crawling: A hosting environment closer to your target can help search engines crawl and index your website much better.
Localized Support
- Thorough Help: Toronto hosting providers understand what local market challenges require, which support resonates well with local problems.
- Time Zone Alignment: Enjoy the support of a customer during your business hours and ensure that your issues are resolved with no delay.
- In-Person Opportunities: Working with a local provider opens doors to face-to-face consultations and strengthens your partnership, ensuring proper communication.
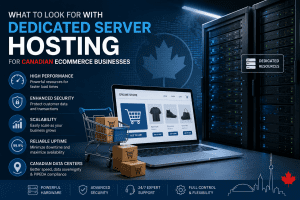
Benefits of Canadian WordPress Hosting Services
Faster Load Times:
- Hosting your website in Canada reduces latency, meaning that it loads faster for local users.
- Speed is essential for user experience; even a one-second delay in loading can impact user engagement and conversion rates significantly.
- A faster site not only improves user satisfaction but also enhances your site's search engine rankings since speed is a ranking factor for platforms like Google.
Local Customer Support:
- You will get customer support targeted to your market if you have a hosting provider based in Toronto.
- Support teams are based in your timezone, making it easier to resolve issues promptly.
- Local knowledge is such that the support team will understand regional challenges and business needs, giving personalized assistance for smoother operations.
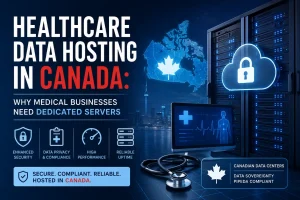
Compliance with Canadian Regulations:
- Hosting in Canada helps you comply with strict data privacy laws, including the Personal Information Protection and Electronic Documents Act (PIPEDA).
- Local data storage ensures compliance with Canadian regulations, reducing legal risks and boosting customer trust.
- Compliance also signals your commitment to protecting user data, which is crucial for maintaining credibility and reputation.
Tailored Hosting Solutions:
- Canadian WordPress hosting providers design plans and services that cater to the specific needs of Canadian businesses.
- Hosting packages are often optimized for local traffic, seasonal demands, and regional trends, ensuring reliable performance throughout the year.
- Scalable choice allows you to easily scale your resources up as your business expands. This flexibility is one you'll need for long-term success.
Community Connection
- Partnering with a local hosting provider helps foster connections within your community.
- These relationships can lead to networking opportunities, collaborative ventures, and even potential partnerships in business.
- Supporting the local businesses in your region strengthens the regional economy, aligning your brand with values of community and sustainability.
By using Canadian WordPress hosting services, you are optimizing your website, but you also get regional expertise, legal compliance, and local partnerships, making it a very good choice for businesses targeting the Canadian market.
How to know when it’s time to switch WordPress hosts
The first step in switching WordPress hosts is to recognize the signs that it's the right time to switch. Moving hosts can be a tough task, so it is important to be sure you're making the right decision for your business, or for your clients.
These are the main reasons you might want to investigate switching to a new WordPress host:
Your site is often down when you aren't expecting.
Unexpected downtime is bad for business, and frequent drops in traffic can also affect your search rankings. If your site goes down more than once a month, and you suspect the host to be the reason, then it's high time to look for another host.
Your present host is slow.
Having a fast and responsive site is an important factor when optimizing your site for higher search rankings and providing a better user experience. If your site continues to load slowly even after disabling unnecessary WordPress plugins and performing optimizations, a new host with better infrastructure might be the right solution.
Your current host’s customer support is poor.
You do not want to be in a situation where your site is down, and you hear that customer support can't help you. If the support team of your host is slow to respond, difficult to reach, or they simply do not know how to help, then it is time to look for a new one.
Your current host is missing key features.
You want ecommerce capabilities on your WordPress site, but your host doesn't offer WooCommerce. In this case, it's far easier to get a host that either manages the functionality for you, or at least supports it, than it is to set up and manage the software yourself.
Your current host doesn't back up your site automatically.
Having regular backups of your site is paramount—one will find recovering a site very slow and painful if not impossible in the absence of one. In case your present host does not frequently back up your site for you, then you should seek a new one.
You have to install WordPress updates yourself.
Most managed WordPress providers will automatically install WordPress core updates and security patches for you. If your current host makes you manage this on your own, you can save time and reduce risk by switching to a managed WordPress host instead.
Note that it goes without saying that any provider will have a few things you are okay with and a few things you are not. You may well be willing to tolerate one or perhaps even two of these, but if more than two of the above items are impacting your sites or if one or more problems continuously come up, it is a clear indication that it is time to look for a new web hosting provider.
Pre-Migration Checklist: Preparing for Seamless Transition
Backup Your Website: Backing up your website-which contains file, database, and plugins reproduction will guarantee to take complete backup of your site in case something goes wrong.
You can use plugins like UpdraftPlus to lower back up a WordPress website online, so one can will let you create whole backups without problems. You also can manually lower back up your web site through your website hosting issuer's record supervisor (i.E., cPanel) or an SFTP (i.E., FileZilla).
Update WordPress Core, Themes, and Plugins
If migrating from one WordPress web site to every other (e.G., changing web hosting company), it’s crucial to replace WordPress center, themes, and plugins to the brand new versions. This guarantees compatibility with the new hosting environment and decreases the chance of problems bobbing up in the course of migration.
Test all updates on a staging website earlier than applying them to your live site, making sure that the replace will now not cause any breakage in your web site's capability. This is how you can troubleshoot problems in a secure surroundings.
Steps: How to Move Your WordPress Site to a Toronto-Based Host
Moving a WordPress site seems like a daunting process, full of potential pitfalls and technical challenges, but if you break it down step-by-step it really becomes a process. It is for this reason that this newsletter is being put through as a, "step-by-step system that will enable you to have a painless website migration to 4GoodHosting, and also have your website working and fully intact throughout the course of this transfer.
Follow those steps very carefully, and you will maximum certainly avoid a good deal downtime and easy your transition into a new web hosting surroundings.
Step 1: Back Up Your Website
Before doing anything or even starting the process of migration, it is mandatory to BACKUP your entire site. You want to keep the old one around because it's your lifeline when things go a bit haywire for the period of migration. A complete backup must include:
- Files: This includes all of your WordPress core files, themes, and plugins.
- Database: WordPress database of all your posts, pages, comments, and person statistics.
- Media: The media, like images and media documents, you add to your web page.
UpdraftPlus or BackupBuddy plugins can drive you a lot easier for the backup manner, it will automate the procedure to backup your records data and to save them to the cloud storage services like Google Drive and Dropbox. Most hosting carriers, as we do at 4GoodHosting, provide integrated backup solutions to keep your web page nice and safe from damage. Taking the time to create a whole backup will offer peace of thoughts and make sure that you can restore your website online to its previous kingdom if necessary.
Step 2: Choose Your Hosting Plan
After you have secured your backup whichever way you like, start to exploring 4GoodHosting’s unique plans designed only for WordPress. Choosing the right hosting plan makes a difference in terms of optimal universal performance and capability of your website. As you look through the options, remember these capabilities:
- SSD Storage: Compared to conventional difficult drives, Solid State Drives (SSDs) offer faster loading periods and greater standard total performance. This can greatly decorate the velocity of your internet web page, which is vital for man or woman enjoy and also SEO.
- Free SSL Certificates: An SSL certificates is important to safe connections between your net web sites and its shoppers. It uses encryption to secure the facts that are exchanged between the two since it is able to keep sensitive facts safe
An included benefit is getting free SSL certificates as an element of your net web hosting package.
Installation of Word Press without Difficulty: You should search for website hosting plans that provide one-click on Word Press installations. As a result, this makes you in-between an elegant setup manner which helps you to get your web web site up and walking fast while not amazing technical know-how.
After making a plan that aligns with your preferences, check ahead and be there.
Make certain to be aware of any setup instructions or credentials supplied through 4GoodHosting as you prepare emigrate your website.
Step 3: Configure Your New Hosting Account
Once you have registered for your 4GoodHosting, the next step would be to configure your new hosting environment. Such typically After signing up for your 4GoodHosting, it will then be time to set up your new hosting environment. This usually requires multiple steps:
- Domain Settings: If it's an existing domain, you will have to configure it in your new hosting account. This will require updating the domain settings or linking your domain to a new host.
- Accessing cPanel: After your account has been created, you'll receive access to your new cPanel dashboard. Typical management of various parts of your web host environment like file management, databases, email accounts, etc.
- Database Creation : You might need to create a new database in your cPanel before migrating your database. Typically under the “MySQL Databases” section you can create a new database and assign it a user
Step 4: Export Your WordPress Database
Exporting the existing WordPress database is your next step, since this contains all of your website content and settings. To export the database, do the following steps:
- Log in to phpMyAdmin: Most likely you can find phpMyAdmin under your cPanel, so managing your databases has become quite an easy process.
- Choose Your WordPress Database: Pick the database of your WordPress site from the list.
- Click on the Export Tab: This is usually located in the top menu of phpMyAdmin.
- Choose Your Export Method: Choose the Quick export method, and ensure the format is set to SQL.
- Download the Database File: Click Go to download your database file to your local computer. This file will be used in the next step to import your database into the new hosting environment.
Step 5: Upload Files to the New Host
Now that you have successfully backed up both your website files and database, it is now time to migrate your files off of your old host and to new host. You should be able to do this easily using an FTP client like FileZilla. Here's how:
- Connect to Your Old Host : Use your ftp credentials to access your old hosting account.
- Download All WordPress Files: Go to your WordPress installation's root directory and download all files. These should be the core WordPress files, themes, plugins, and uploads. Then, you will have everything on your site.
- Connect to Your New hosting Account: Immediately disconnect from the old host after you have downloaded all your files, then access your new account using the FTP credentials at the time of registration.
- Upload the Files: Transfer all the downloaded WordPress files to the root directory of your new hosting account. This process may take some time, depending on the size of your site.
Step 6: Import Your Database
With your files now uploaded to new host, the next step is to import your previously exported database into your new hosting account. Here’s how to do it:
- Log in to Your New phpMyAdmin: Access phpMyAdmin through your new host cPanel.
- Select the Newly Created Database: If you haven't created a database yet, do so now. Select the database you just created.
- Click on the Import Tab: This will allow you to upload your previously exported database file.
- Select the SQL File: Click on Choose File, then select the downloaded .sql file and click Go to import. This should take a few seconds or minutes in the case of large database sizes.
Step 7: Update wp-config.php
You should update your wp-config after successfully importing your database. php file to update the database settings accordingly. It contains all your important configuration data and is the essential file sitting in the root directory of your WordPress installation. Here's how to update it:
- Locate wp-config. php : In the root directory that you used to upload your WordPress files, use your FTP client to go to the right folder.
- Open the wp-config. php file in a text editor.
- Update the information in database : Find the lines below and update it with your new details about db
- Save changes: After making changes to the file, save and close your editor.
Step 8: Point Your Domain to the New Host
At this point with all of the files and databases in location and the configuration up to date, is while you can direct your domain on your new server. And that is the step that guarantees people coming for your site navigate to the ideal destination. To update your DNS information:
- Log in to Your Domain Registrar Account: Access the account from which you purchased your area.
- Update the Nameservers: Find the setting to change your nameservers. Link your current nameservers with those given to you by using 4GoodHosting when you installation an account.
- Allow for DNS Propagation: DNS Propagation May Take Time After converting the nameservers, it may take about 48 hours for the changes to propagate at the Internet. Your website may be available intermittently during this time-frame.
Step 9: Test Your Site
Once the DNS modifications have propagated, it’s time to offer your website a terrific test to make certain the whole thing is in working order. The following gadgets should be tested:
- Check All Links – Go through your website and click on on each hyperlink to make sure they may be all functioning well.
- Test Images and Media: Make positive all of your photos and media files are loading successfully. Sometimes, the document course may exchange at some stage in migration so make certain to double check them.
- Test Plugins: If you've got set up any plugins, ensure they may be running great. This will include trying out any bureaucracy, sliders or other interactive factors to your website.
Should you enjoy any troubles at the same time as testing, simply restore your web page from considered one of your preceding backups or reach out to the help group at 4GoodHosting who're there to help and might assist with any troubleshooting you could need at some point of this technique.
Step 10: Optimize Your New Setup
After a successful migration, you have got a terrific chance to optimize your web page more for performance and user enjoy. You can do this by using using:
- Caching: Also, you may use caching plugins like W3 Total Cache or WP Super Cache with a view to reduce load instances. Caching is set caching static model of your website online what gives faster get admission to to your web page for returning visitors.
- Search engine marketing Plugins: Boost your website’s search engine publicity by way of putting in search engine optimization plugins like Yoast SEO or All in One SEO Pack. They can help with content optimization, meta tag management and XML sitemap technology.
- Regular Backups: You absolutely need to be backing up your website frequently. Use 4GoodHosting’s backup gear to routinely create full backups on a normal frequency so you have a latest copy of your web site to be had in the event whatever happens for your live one.
- Performance Monitoring: Make Sure that you are the usage of Google PageSpeed Insights or GTmetrix to look how your website is acting and this will let you recognize the regions of development so that pages can load faster as feasible and providing higher person revel in.
With these steps and taking time to fine-tune the new setup, you can guarantee that your WordPress site will work fine on 4GoodHosting and give good experiences to visitors.
Conclusion
Moving your WordPress website to the Toronto-based web hosting company 4GoodHosting will beautify its speed and reliability, which are vital on your fulfillment. It's critical to have a team that knows the precise wishes of the Canadian market as you embark on this journey. While the manner may also seem daunting, it can be navigated successfully with right making plans and practise. If you run into any problems at some stage in the migration or are unsure of your next steps, professional guide is with no trouble to be had. Need help migrating your site? Contact us now for expert assistance!
With 4GoodHosting, you can expect excellent, protection, and safety, along side personalized provider that demonstrates their commitment in your business. This manual will assist make certain that your WordPress website online is migrated smoothly, setting a strong basis for destiny increase and achievement with 4GoodHosting. You'll advantage from either pinnacle-notch overall performance or tailor-made carrier, making the transfer to a dependable neighborhood website hosting issuer a smart circulate for boosting your online presence.
FAQ
What is WordPress site migration?
WordPress site migration is the process of transferring your WordPress website from one hosting provider to another. This includes moving the website files, database, and other necessary components to ensure your site functions properly on the new host.
Why should I choose a Toronto-based host?
Choosing a Toronto-based host, such as 4GoodHosting, offers several advantages, including faster loading times for local visitors, compliance with Canadian data privacy regulations, and access to customer support from teams that understand your local market needs.
What are the steps to migrate my WordPress site?
The migration process typically involves the following steps:
- Backup your existing WordPress site.
- Choose the right hosting plan and set up your account with the new host.
- Download your WordPress files from the old host.
- Export your WordPress database.
- Upload your files to the new host.
- Import your database into your new host.
- Update your wp-config.php file.
- Point your domain to the new host.
- Test your site to ensure everything is functioning correctly.
Do I need to hire a professional to migrate my site?
While many users successfully migrate their sites themselves, hiring a professional or seeking assistance from your new host's support team can save time and reduce the risk of errors, especially if you're not comfortable with technical tasks.
How long does the migration process take?
The time required for migration can vary based on the size of your site and the method used. It typically takes a few hours to a couple of days, especially when considering DNS propagation time after changing your domain settings.
Will my site experience downtime during migration?
Some downtime may occur, particularly when changing your domain's DNS settings. However, following best practices, such as meticulous backups and planning, can minimize these interruptions.
Should I back up my site before migrating?
Yes! Always create a full backup of your WordPress site before migration. This ensures you can restore your site to its previous state if anything goes wrong during the process.
What if I encounter issues during migration?
If you encounter issues during migration, reach out to your new host’s customer support team for assistance. 4GoodHosting offers expert support to help resolve any problems that arise.
Can I keep my existing domain name?
Yes, you can keep your existing domain name while migrating to a new host. You just need to update your domain's DNS settings to point to your new hosting provider.
How can I ensure my new hosting environment is optimized?
After migration, consider implementing caching solutions, optimizing images, using security plugins, and regularly backing up your site. Additionally, communicate with your host about server optimizations they may offer.
What features should I look for in a Toronto-based host?
When choosing a Toronto-based host, look for features such as:
- Fast loading speeds
- Robust security measures
- Local customer support
- Reliable uptime
- Scalable hosting plans
Is there assistance available for migrating my site to 4GoodHosting?
Absolutely! 4GoodHosting offers specialized support for site migration. If you need help migrating your site, don't hesitate to contact us now for expert assistance!
Feel free to reach out if you have more questions or need further clarification on any aspect of migrating your WordPress site!