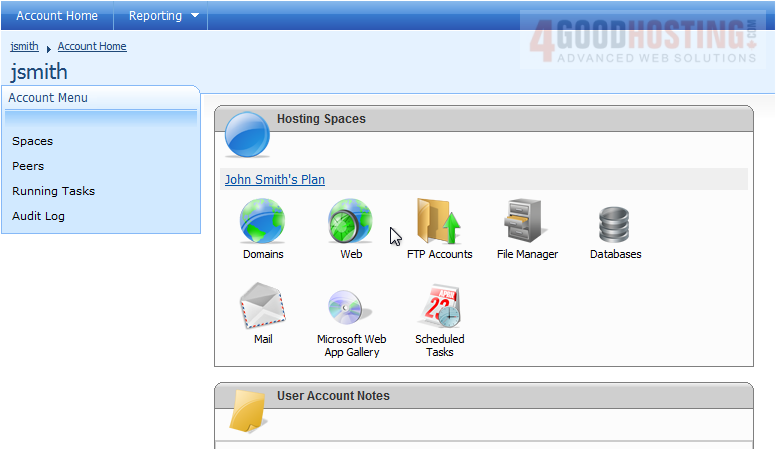
This tutorial assumes you are already logged in to WebsitePanel
Now let's learn how to create a mail account
1) Click on the plan you want to add a mail account to
2) Then click Mail
 
3) Click Accounts
 
4) Click Create Mail Account
 
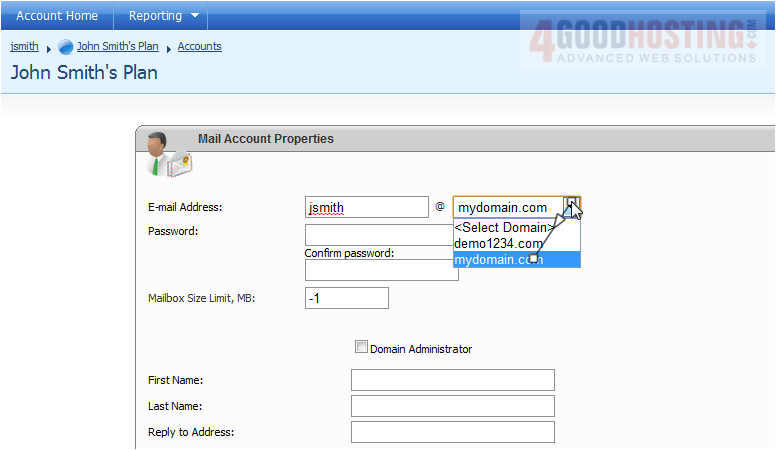
5) Enter the e-mail address
 
6) Select the domain
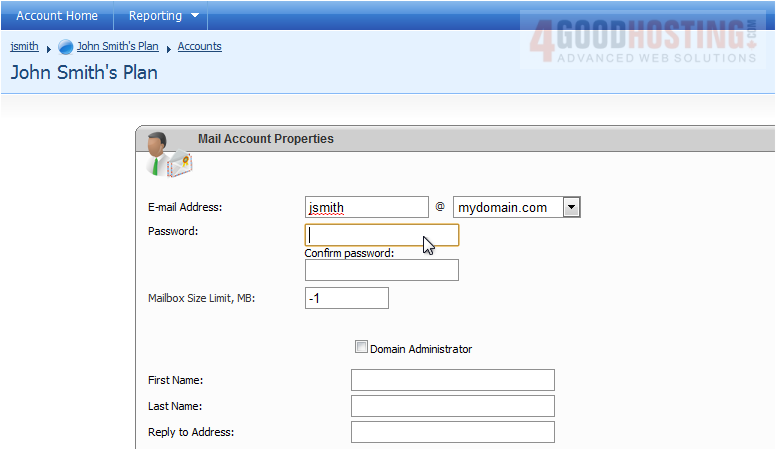
7) Enter a password
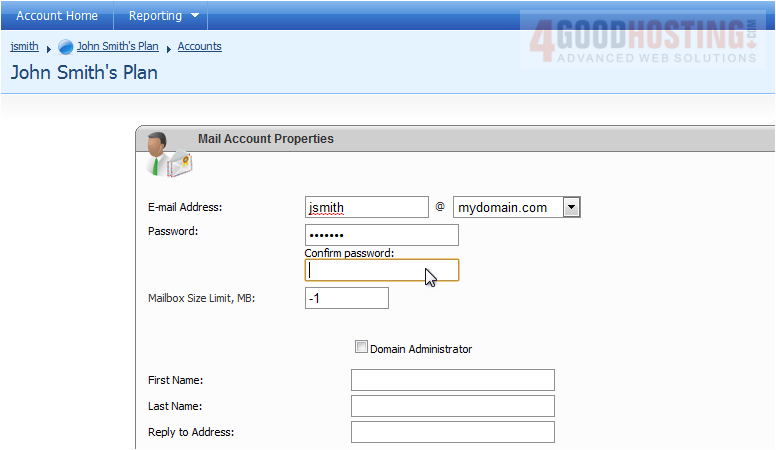
8) Re-enter the password
9) You can limit the amount of space the mailbox can take up
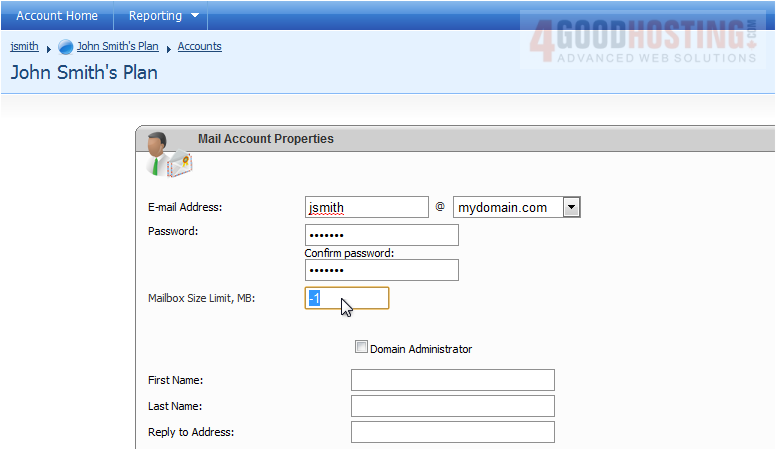
10) You can select whether this user is the domain administrator

11) Enter the first and last name you want to be associated with this account

12) You can enter a signature to be added on to the end of messages

13) You have the option to set up an autoresponder and mail forwarding
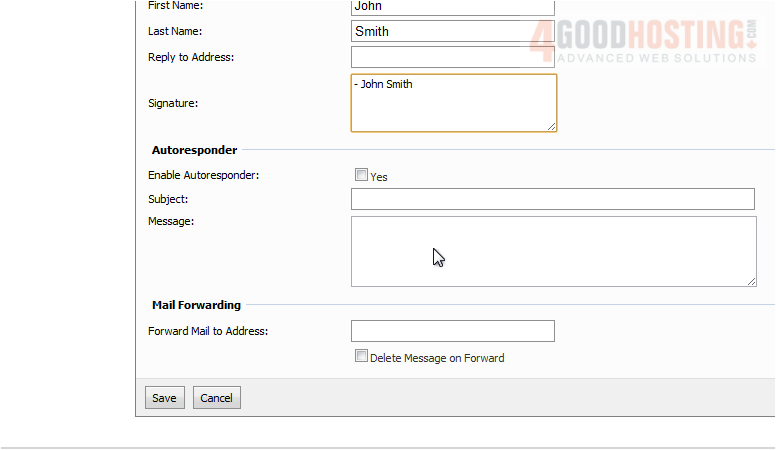
14) When you are finished, click Save
Â
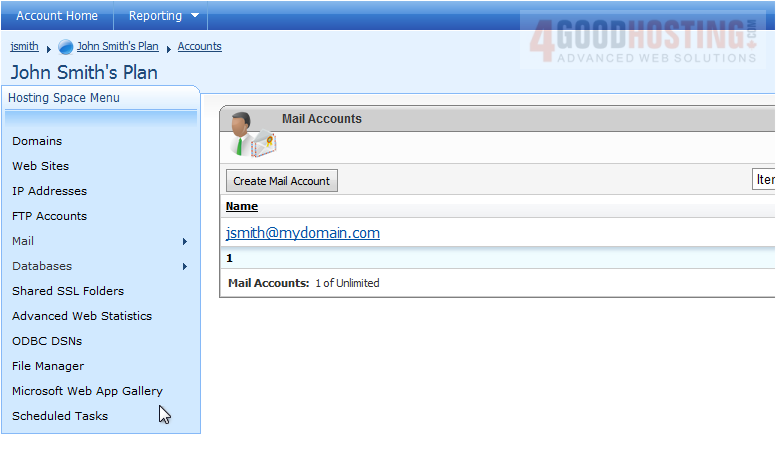
Success! Your new mail account appears in the list below
Â
This is the end of the tutorial. You now know how to create a mail account in WebsitePanel

 WGS AI Assistant