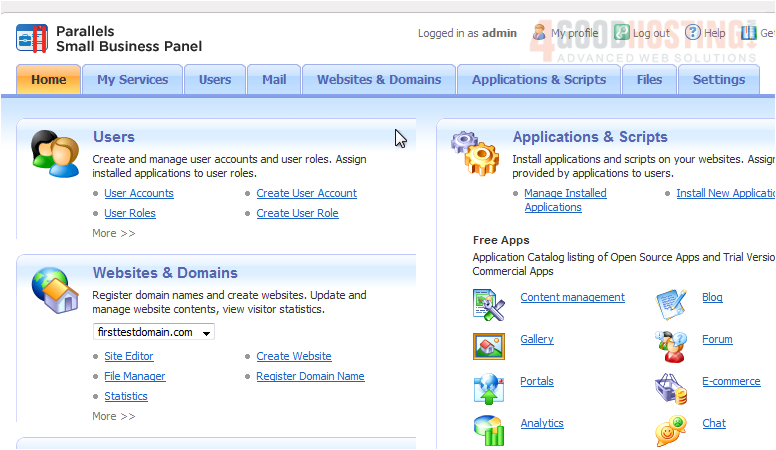
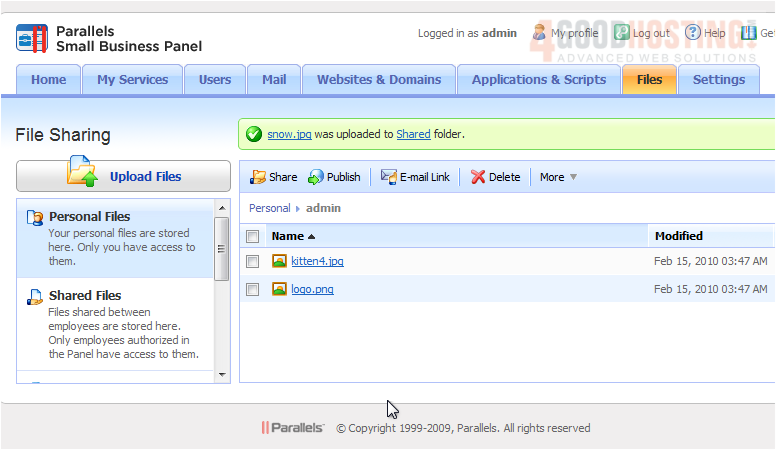
In this tutorial, we will take a look at the File Sharing feature.
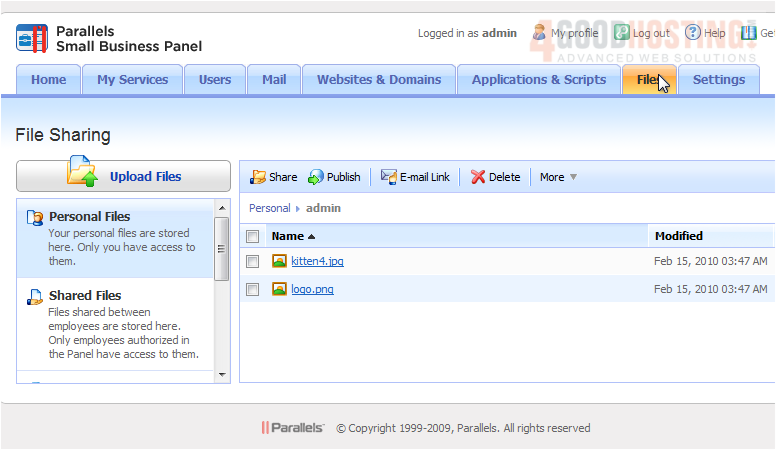
1) Click the Files tab here
Â
Using this interface, you can upload files and set who can view them.
Â
Let's upload a file now.
Â
2) Use the Browse button to select a file from your computer.
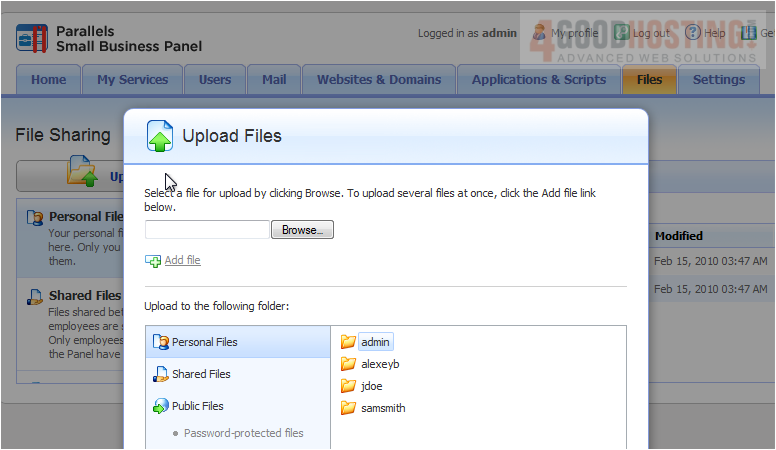
3) Choose the location where the file should be uploaded.
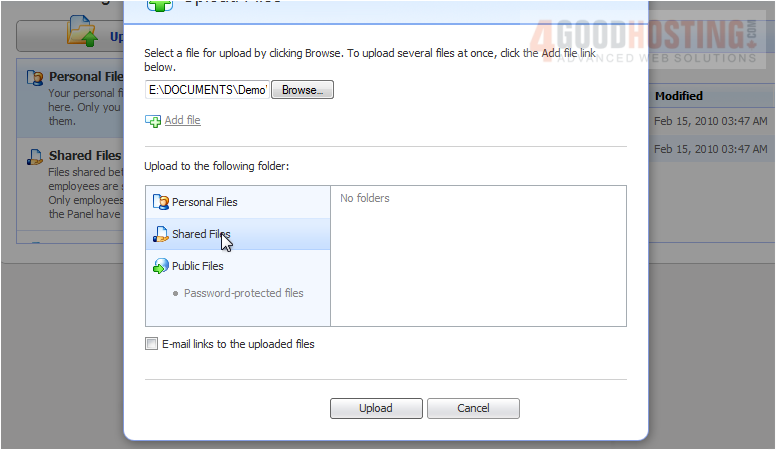
4) Then click Upload.
Â
Currently, we are in Personal Files which are viewable only by the owner.
5) To share a file, select it...
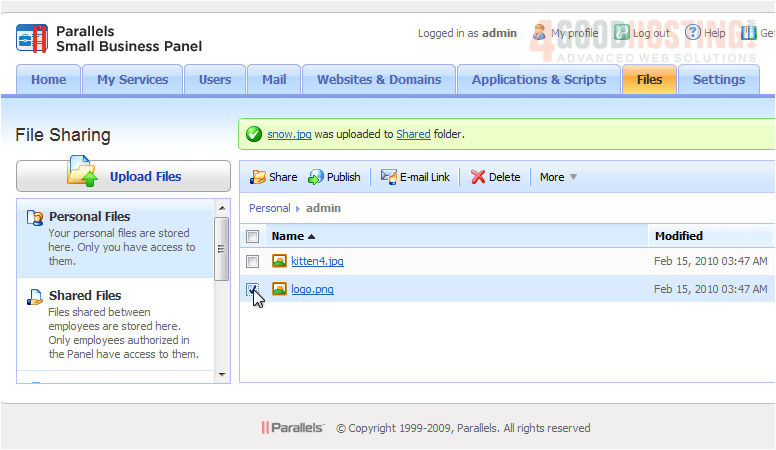
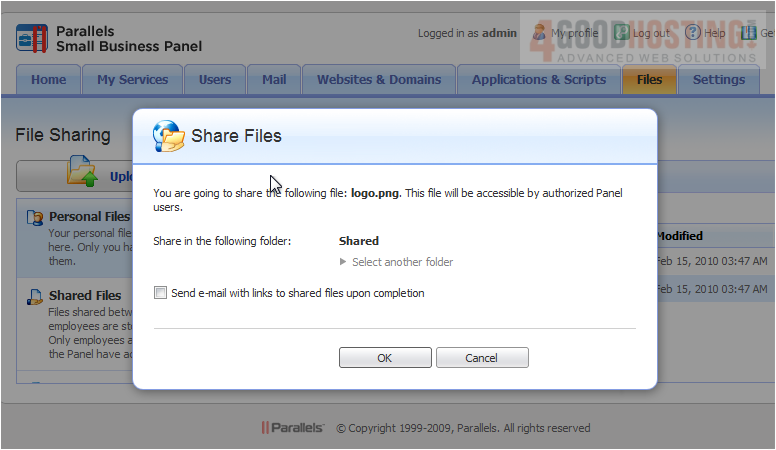
6) ...and click Share.
Â
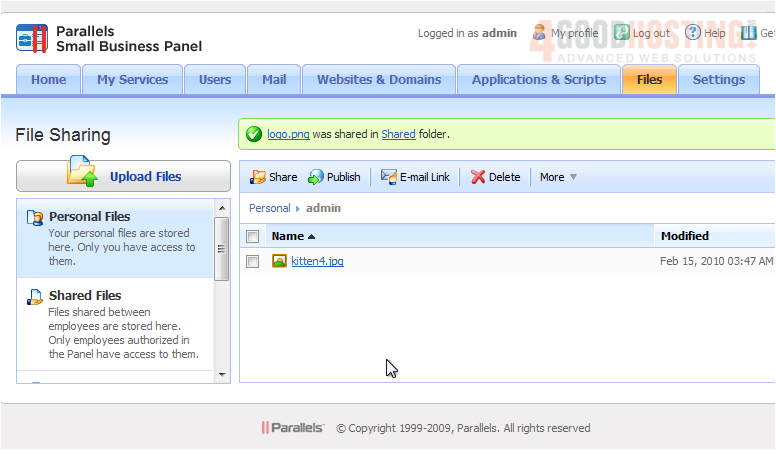
7) Click OK.
Â
The file has been moved to the Shared folder and no longer shows up here.
Â
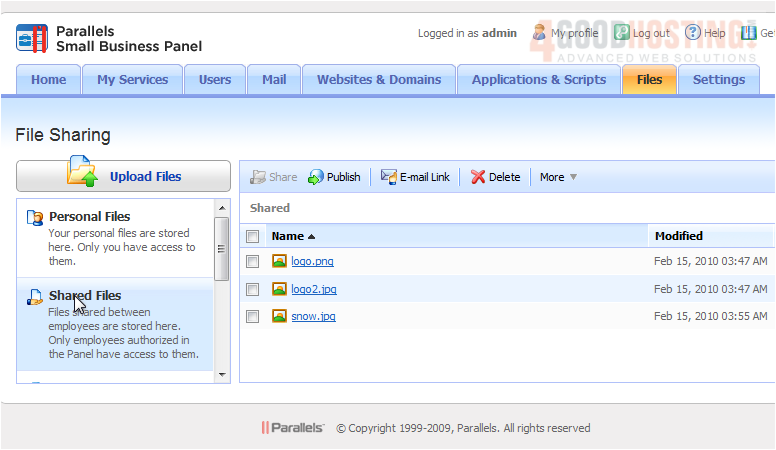
This is the Shared Files folder which is viewable only by employees who have access to the panel.
Â
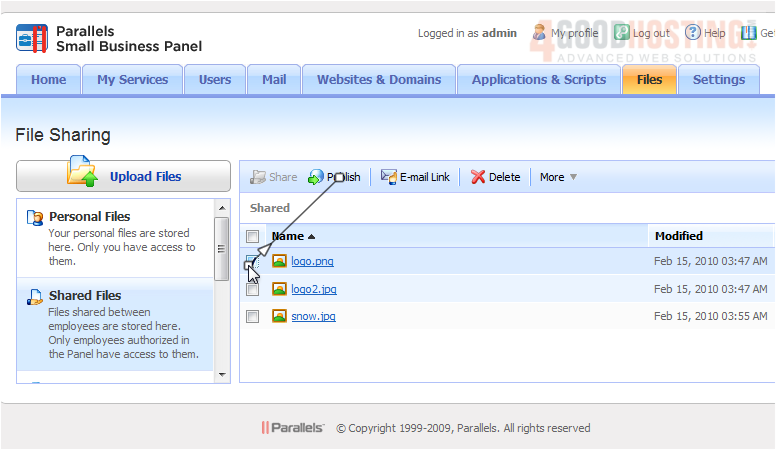
If you want the file to be visible to anyone, you will need to Publish it.
Â
8) Select the file and click Publish.
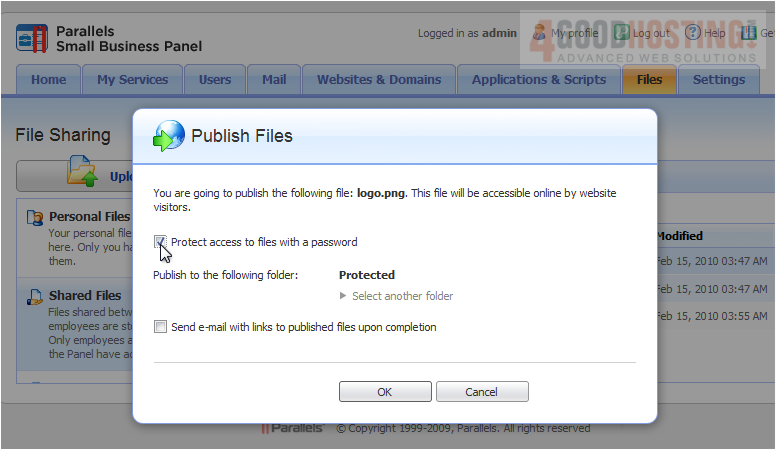
9) Check this box if you want to require a password to view this file.
Â
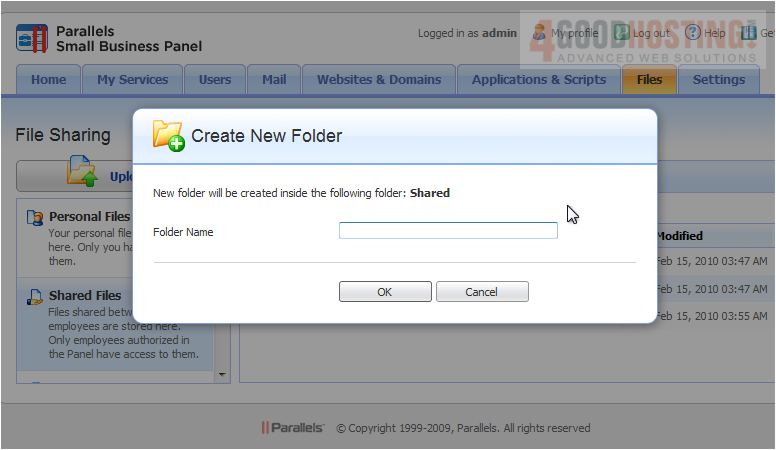
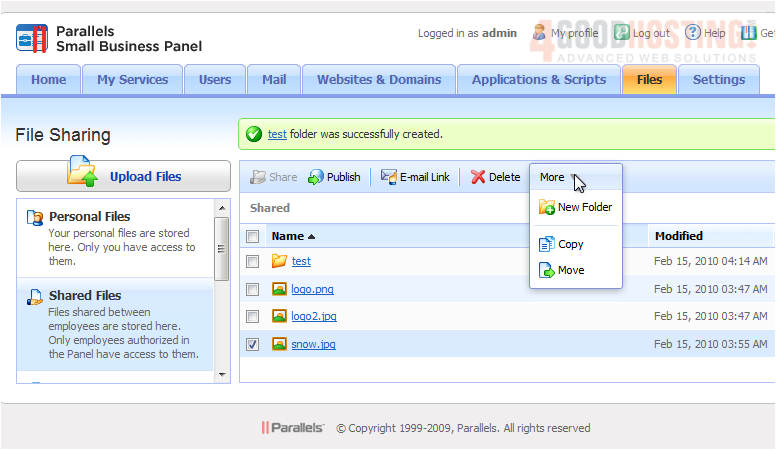
Folders are a good way to keep files organized. Let's see how to create one.
Â
10) Click the arrow next to More.

11) Select New Folder.
Â
12) Type a name and click OK.
Â
Let's put a file into our new folder.
Â
13) Use Copy or Move, depending on which you want to do.
14) Browse to the new folder.
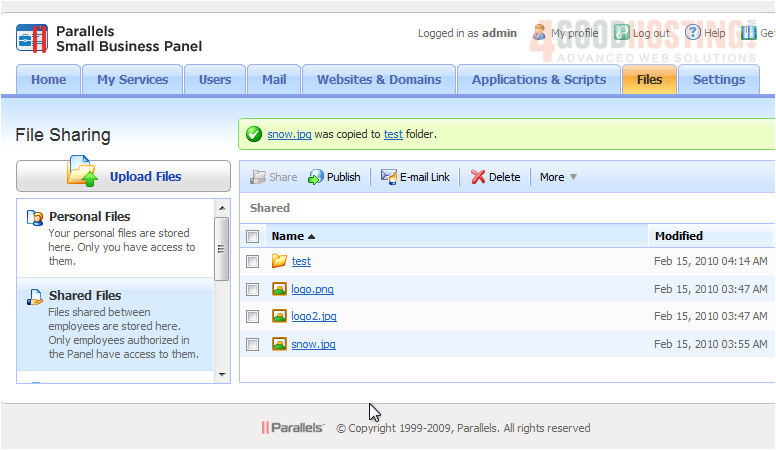
15) Navigate to the folder by clicking on its name.
Â
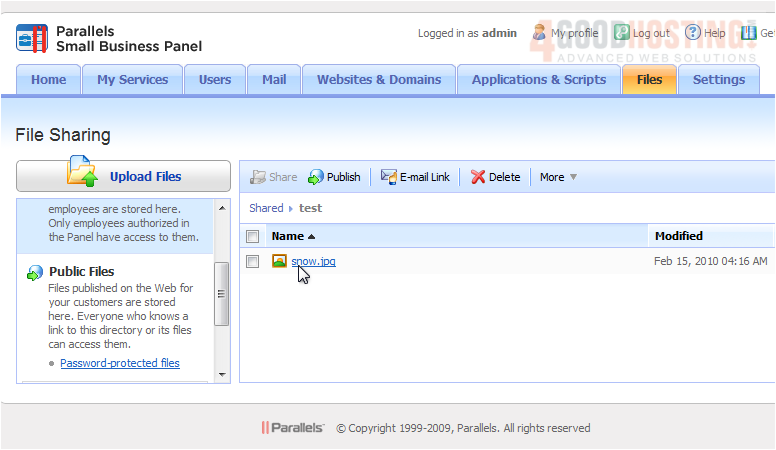
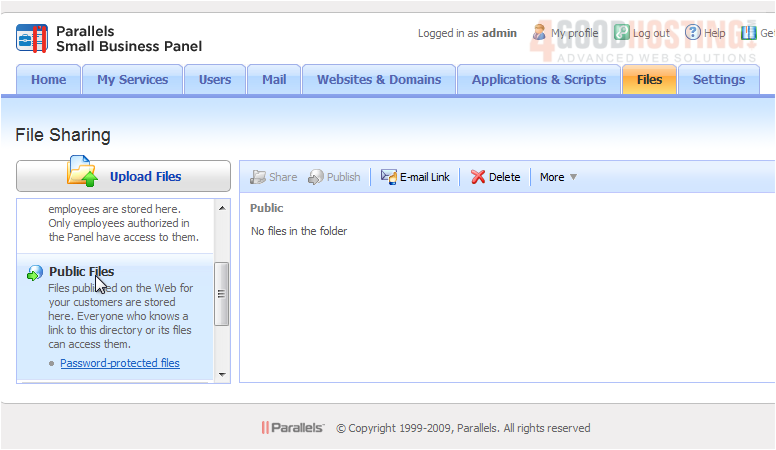
Let's take a look at Public files now.
Â
Here is the file we just copied.
Â
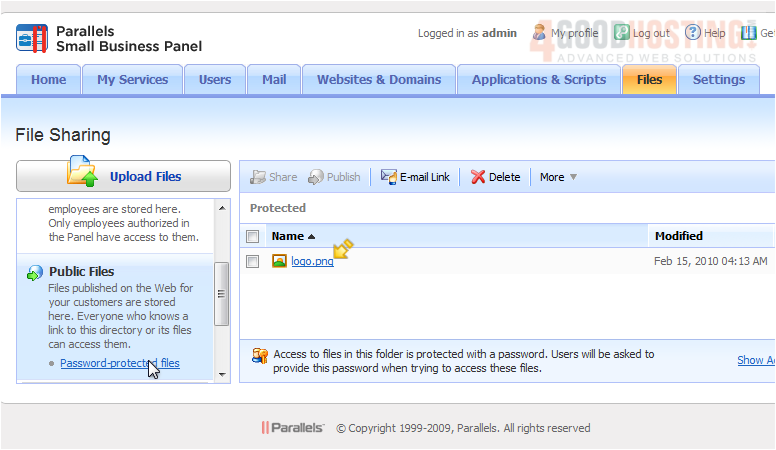
Any files listed here can be viewed by anybody. Since the file we published earlier is password protected, it will show up in another location.
16) Use this link to access password protected files. Here is the file we published earlier.
Â
That's it! You now know how to use the File Sharing feature.

 WGS AI Assistant