
In this demonstration, we will learn how to create and manage users.
After users are created, you can assign them roles each with specific permissions.
Let's begin by creating a new user.
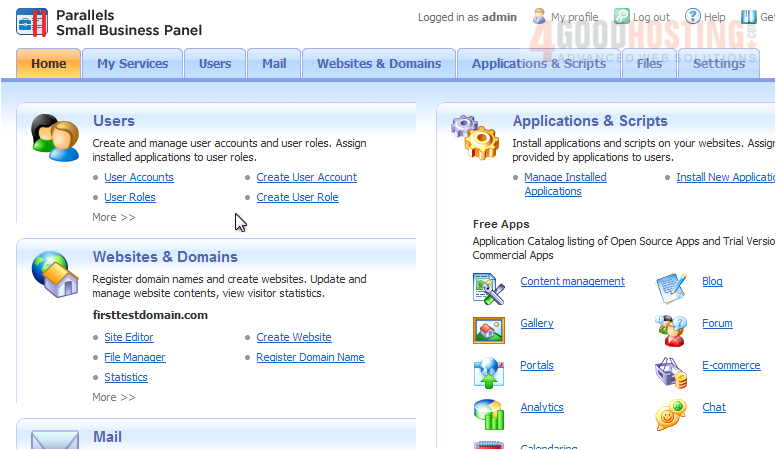
1) Click the User Accounts link here
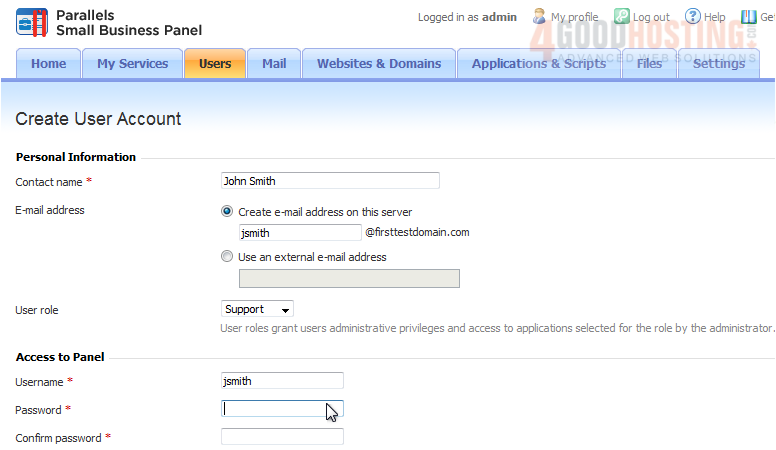
2) First, enter a name for the user.
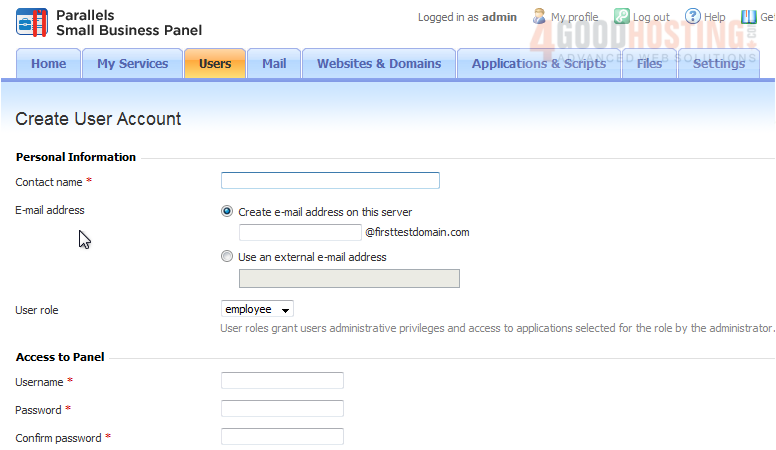
You can choose to create an email address on this server or use an external email address. For this tutorial, we will do the former.

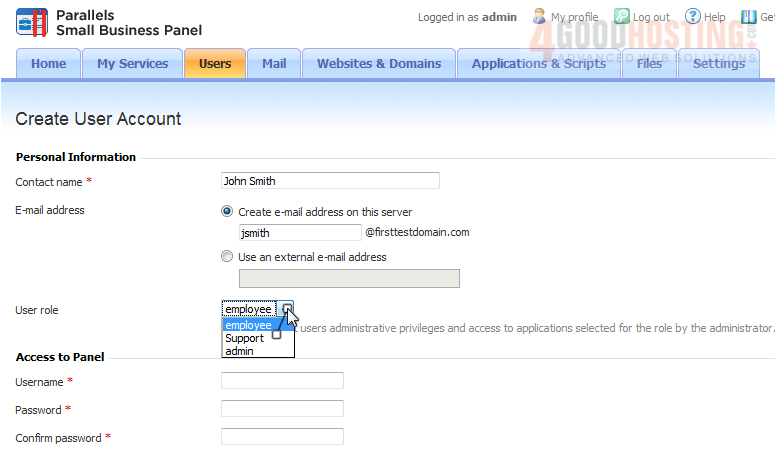
3) Selecting a user role will define how much access this user has to the system.
4) The username is what will be used to log in. Note that this is different than the Contact Name.
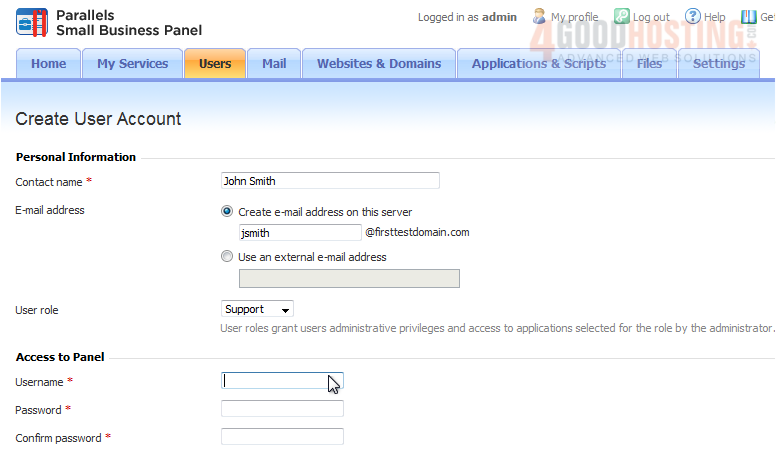
5) Type and confirm a password.
6) Uncheck this box if you don't want the user to be able to access the panel yet.
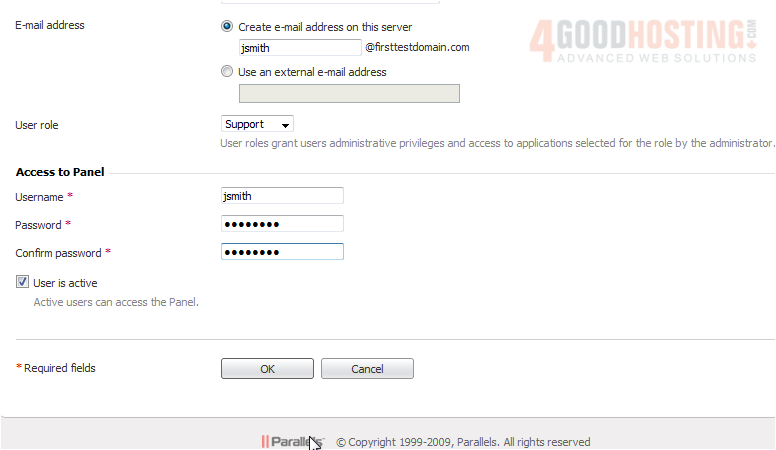
7) Click OK.
Now that the user has been created, let's scroll down and learn how to manage users.
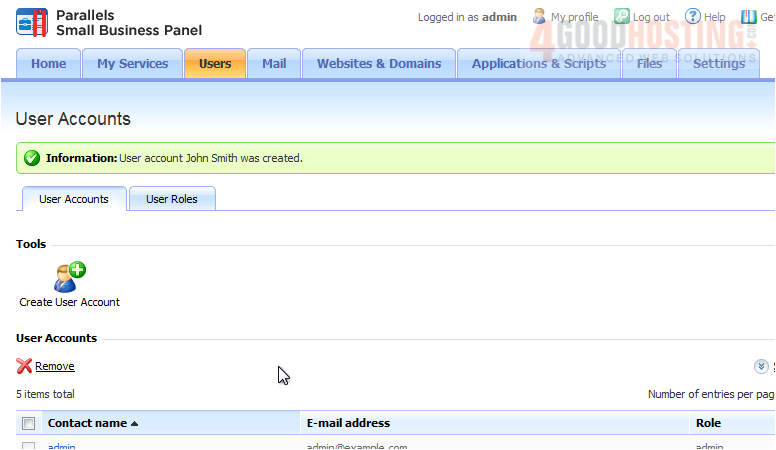
8) To edit a user, simply click the name.
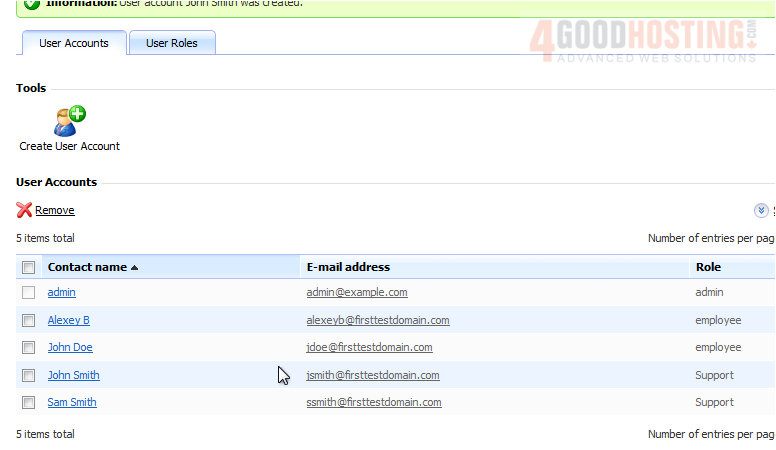
9) Make any changes then click OK.

10) To delete a user, select the box and click Remove.
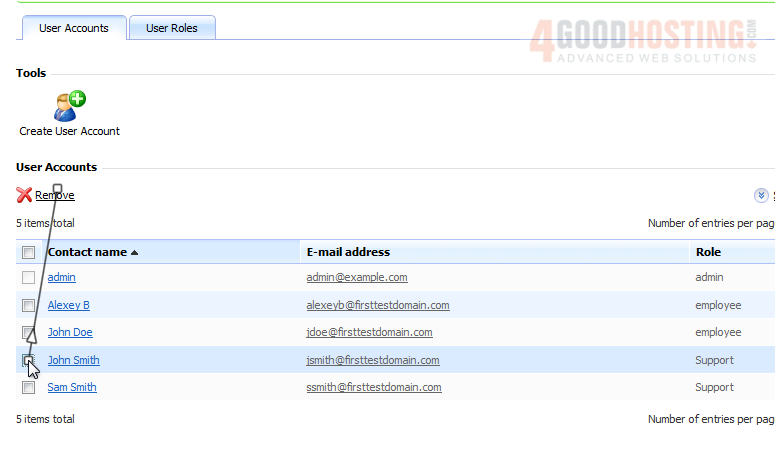
11) You will be asked to confirm deletion.

That's it! You now know how to create and manage users.

 WGS AI Assistant