
Portal Home  /  Knowledgebase  /  WebsitePanel end-user series  /  How to setup email forwarding in WebsitePanel

How to setup email forwarding in WebsitePanel

Guide from WebsitePanel end-user series — written for Canadian customers. Billing always in CAD.

WebsitePanel end-user series

This tutorial assumes you are already logged in to WebsitePanel

Now let's learn how to set up email forwarding

1) Click on the plan you want to add email forwarding to


2) Click Mail
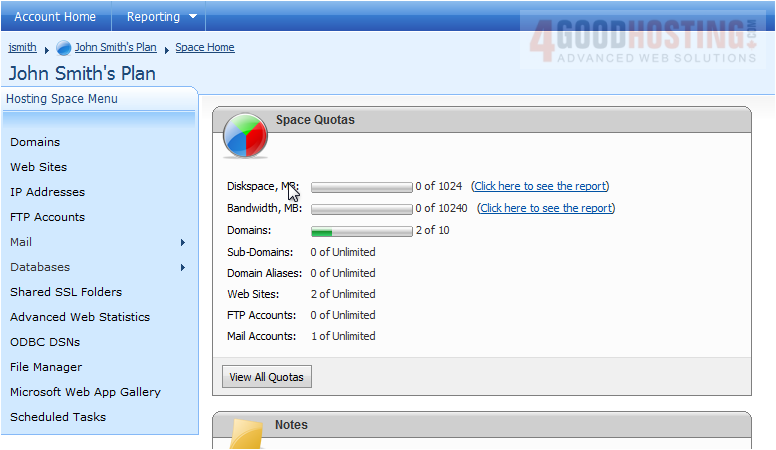
 

3) Click Mail Aliases


4) Click Create Mail Alias
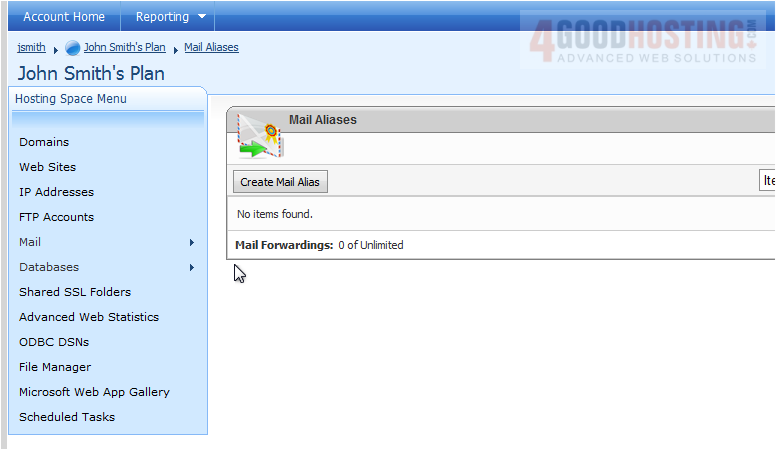
 

5) Enter the email address
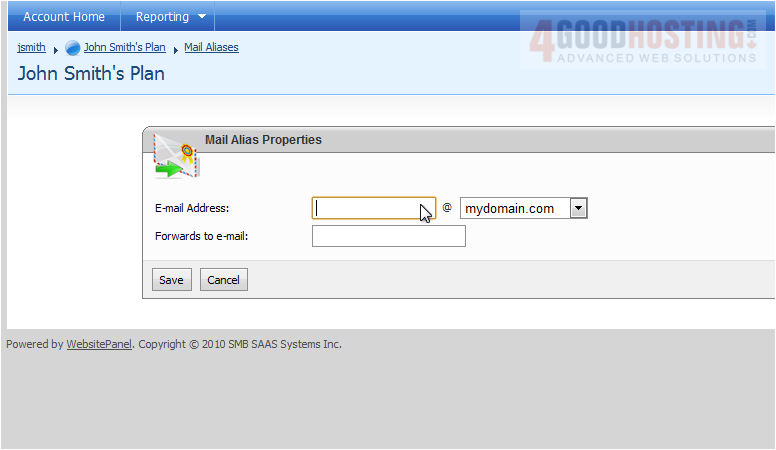
 

6) Select the domain
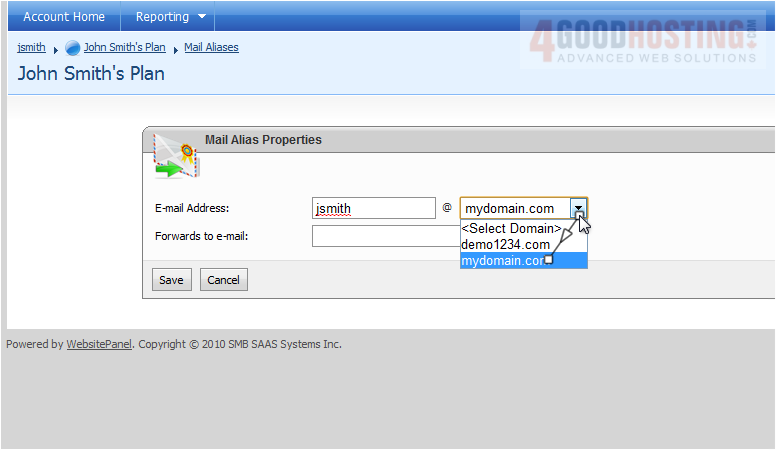
 

7) Enter the email address you want to forward mail to
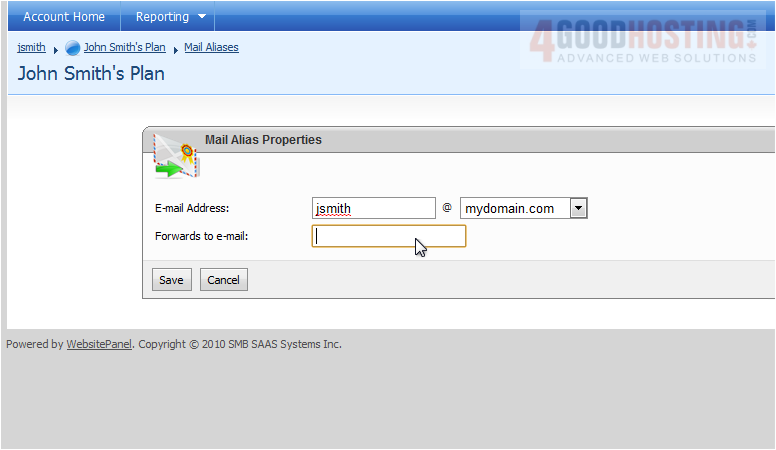

8) Click Save


Success! The new forwarding address shows up in the list below
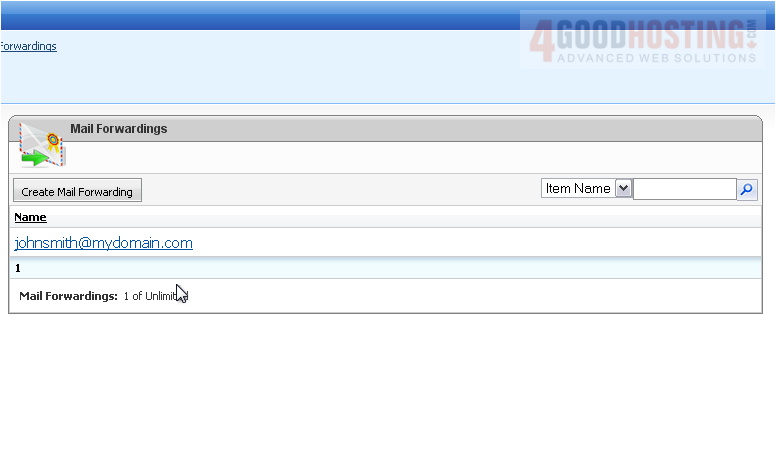

This is the end of the tutorial. You now know how to set up email forwarding in WebsitePanel

Was this answer helpful?

🇨🇦 Canadian support that answers

Chat or ticket — Vancouver & Toronto team, same timezone as most of our customers. Billing always in CAD.

Open a support ticket

Live chat

Quick questions while you’re working through this guide.

Start chat

More in this category

Browse other guides in WebsitePanel end-user series.

WebsitePanel end-user series →