
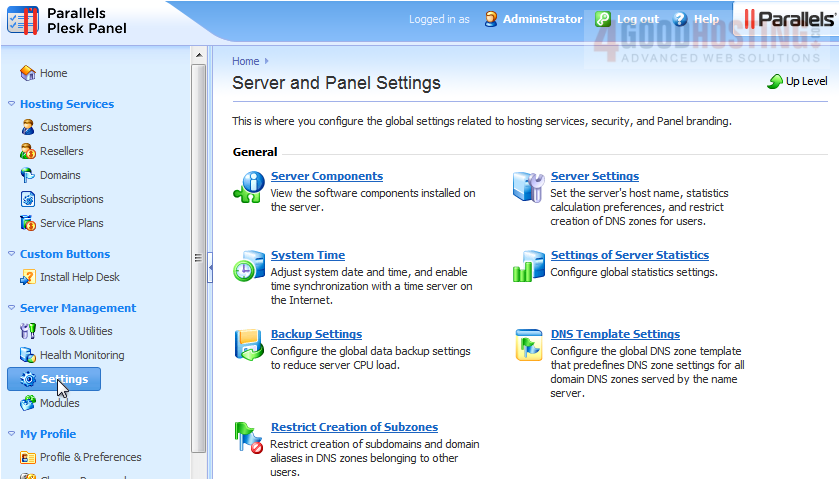
1) Whenever a new domain is added in Plesk, it uses the DNS Zone Template. You can customize this by going to Settings, then DNS Template Settings.
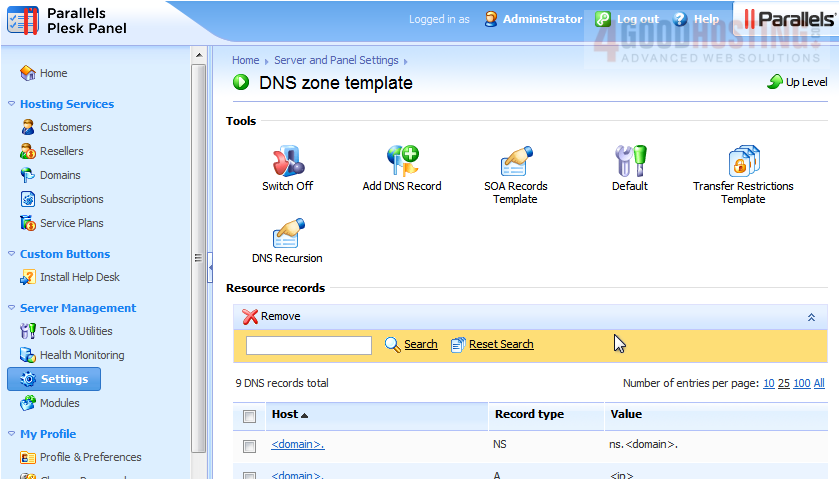
There are a number of different tools here. You can Switch Off the local DNS service for all newly created domains, Add a DNS Record to the template, and edit the SOA Records Template. You can also revert the DNS Template to the default settings, as it was originally when Plesk was first set up. Let's see how to Add a DNS Record.
2) Select the Record type. We'll make a new CNAME record.

3) Enter the domain name.
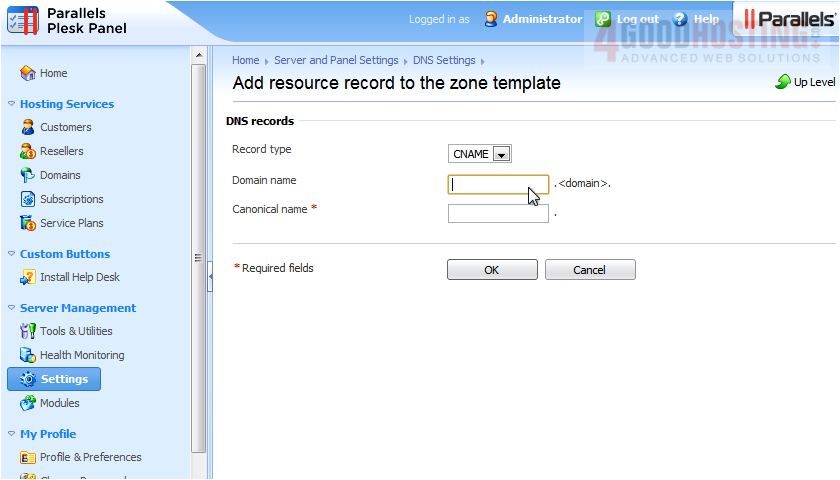
4) Then enter the canonical name. Note that you can use <domain> as a wildcard. Click OK.

The new DNS record has been added to the template successfully.

At the bottom of this page, you'll find a list of all the records in the template, including the one we just created.
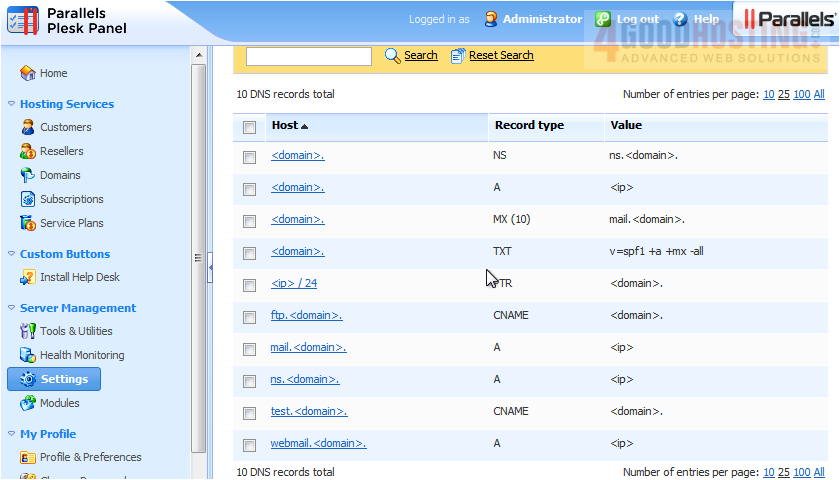
5) To delete one or more records from the template, click the checkboxes next to each.
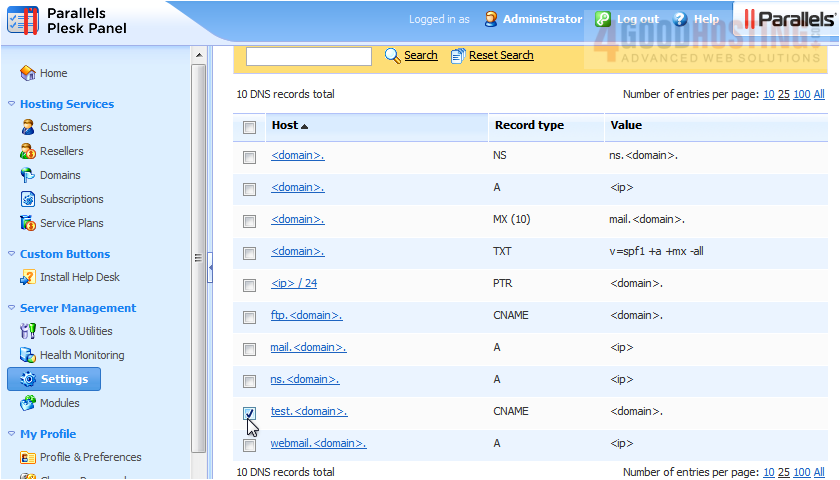
6) Then click Remove.

7) Confirm the removal, then click OK.
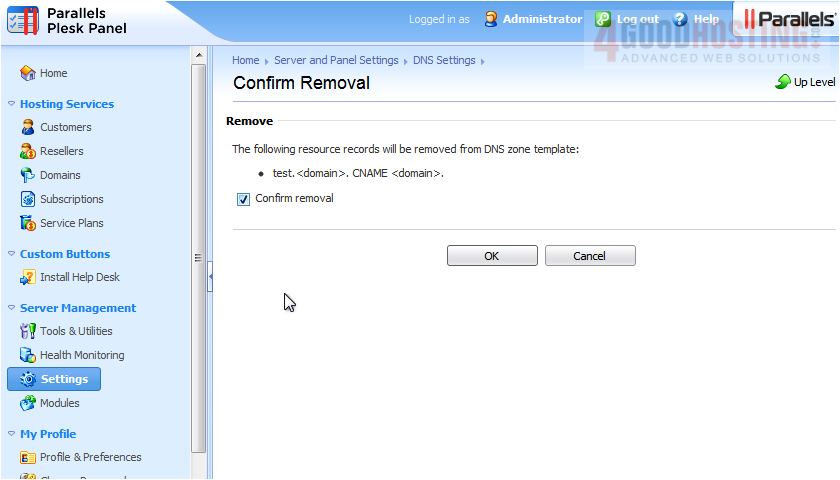
The record has now been deleted.

This is the end of the tutorial. You now know how to configure the DNS Template Settings in Plesk.

 WGS AI Assistant