If you installed the sample data when setting up Joomla, you should have such a menu already. This tutorial, then, will only be useful if you did not install the sample data, or if you've accidentally deleted the menu
1) Go to Menus...
 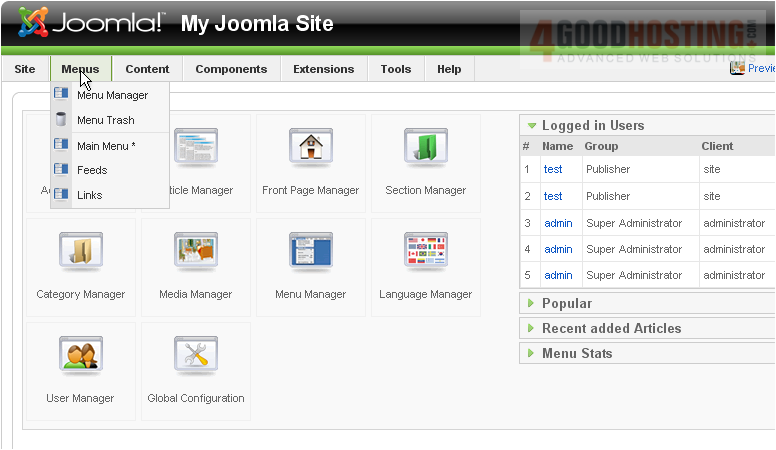
2) ...then click Menu Manager
Â
3) Once there, click the New button

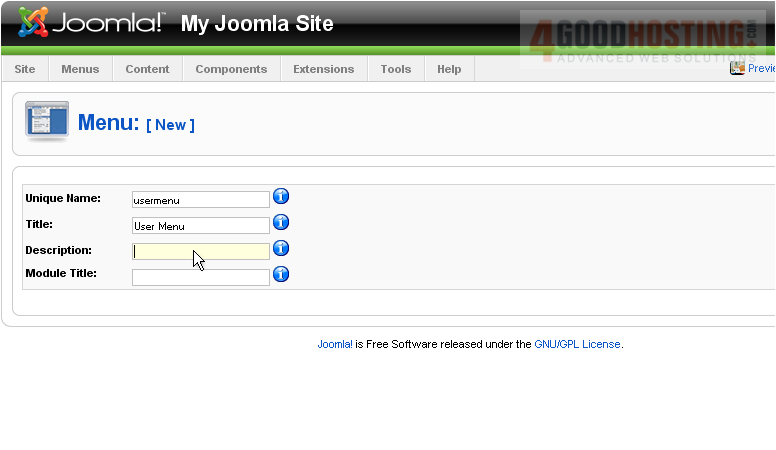
4) The Unique Name is what Joomla uses to identify this module within the code
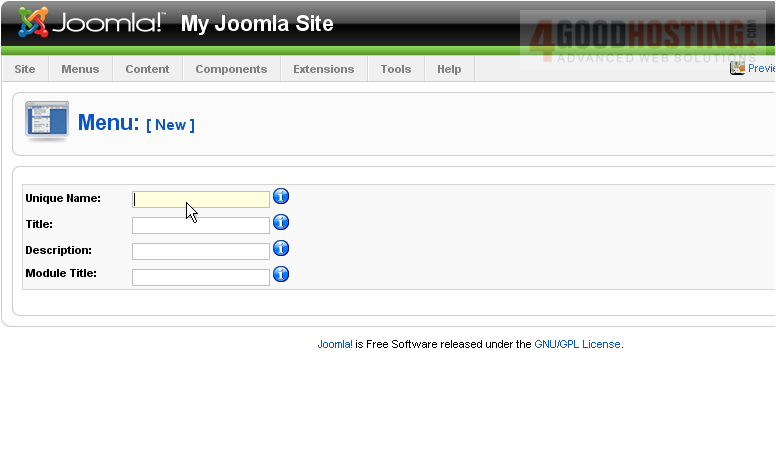
5) Enter a Title
 
6) Type a Description
7) The Module Title is what will display on the front-end. If this field is left blank, the module will not be created and this menu will not show up

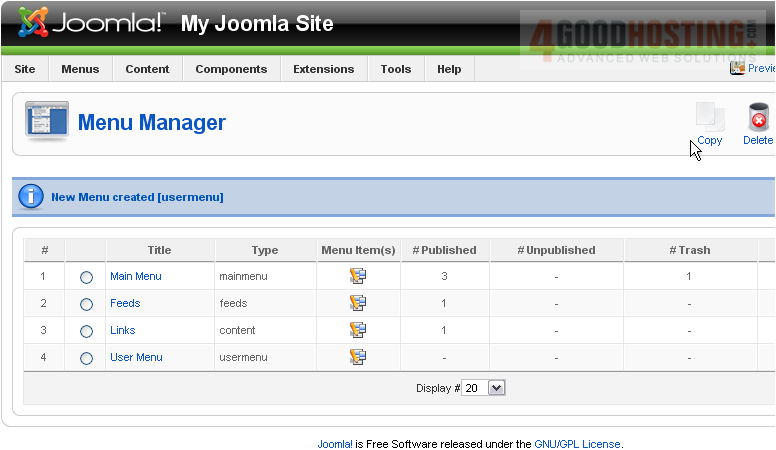
8) Click Save
 
9) Now, click this icon to add items to our new menu
Â
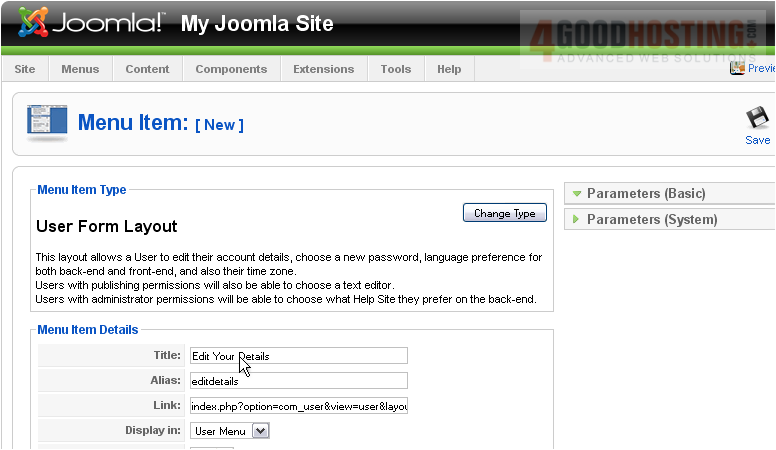
The first item we create will allow users to edit their details, such as e-mail address and password
Â
10) Click New
 
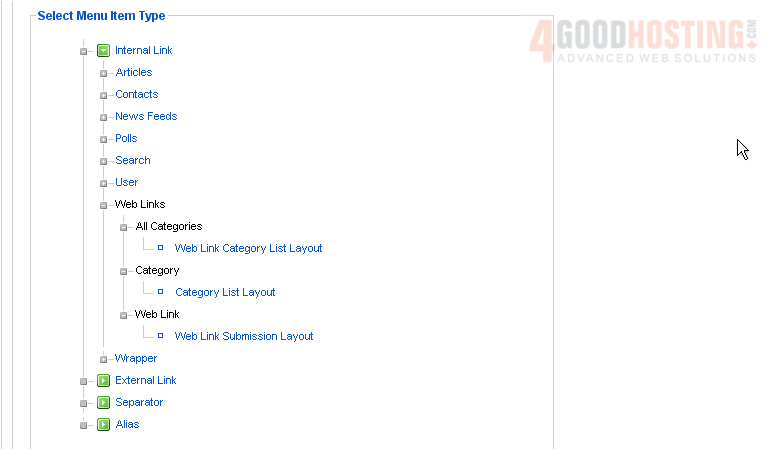
11) Click User
 
Â
Scroll down
Â
12) Click User Form Layout
 
Â
Scroll down
Â
13) Choose a Title
 
14) The Alias is an internal name that Joomla uses in the URL if SEF is enabled

Â
Entering an alias is optional; and, if left blank, Joomla will create a default one by automatically converting the title to lowercase and replacing any spaces with a hyphen
Â
However, you may manually enter an alias, if desired
Â
15) This link is of no use to a guest, so turn the Access Level to Registered
 
Â
Scroll back up
Â
16) Click Save
17) Now, repeat those steps for the final three menu items as shown, starting by clicking the New link on this page
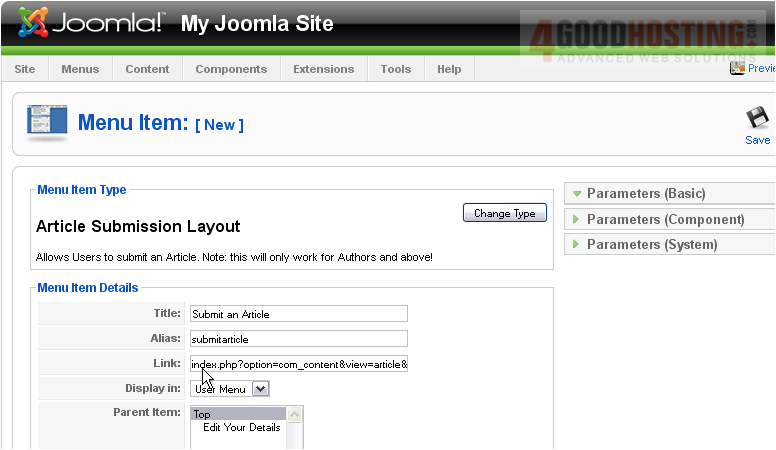
The next menu item we'll be adding will be a link to Submit an Article
Â
18) Click Articles
 
Â
For this item, we will be using Article Submission Layout
 
19) Fill out the form as before

Â
Scroll down
Â
20) Registered users will not be able to use this page; only Authors and above can submit articles. So, this time, we'll set the Access Level to Special
 
21) Scroll back up and save
Â
Now, let's let Special users add Web Links
Â
22) Click Web Link Submission Layout
Â
The last link will allow users to Log out
Â
23) Click Default Login Layout
 
Â
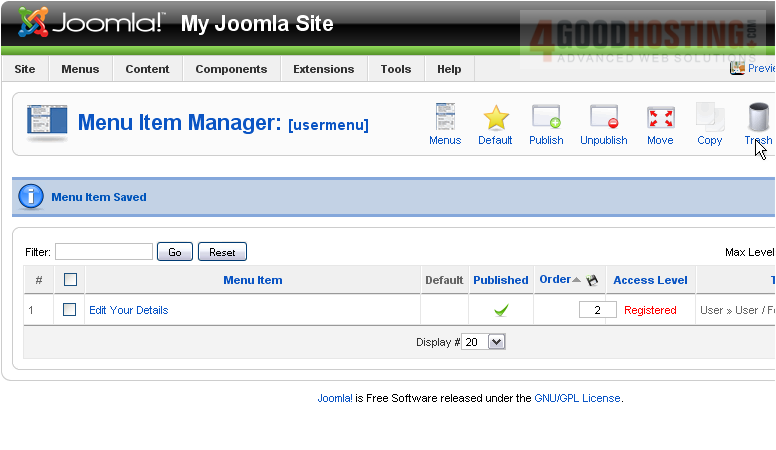
All four menu items have been set up

24) Now, let's enable our menu's display module. Go to Extensions...
 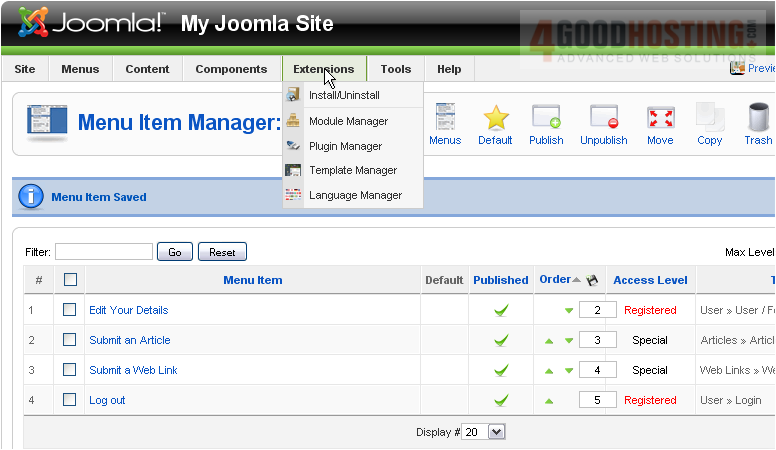
25) ...Module Manager
Â
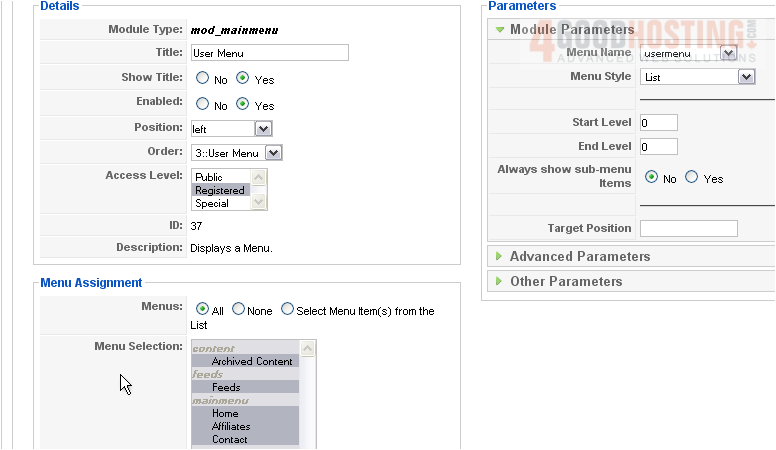
26) Enable the User Menu module

27) Then, click the down arrow until our User Menu is below the Main Menu
 
28) Now, change the Access Level to Registered
 
Â
Now, let's change one more setting
Â
Scroll down
Â
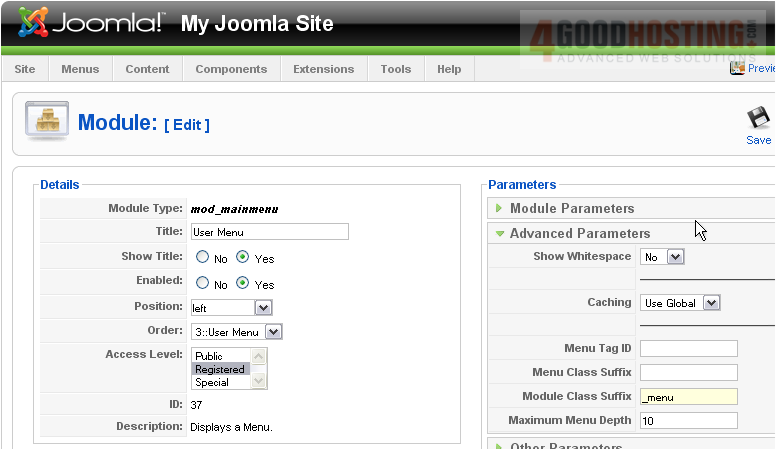
29) Open up the Advanced Parameters
30) Under Module Class Suffix, type _menu
 
Â
Scroll back up
Â
31) Click Save
Â
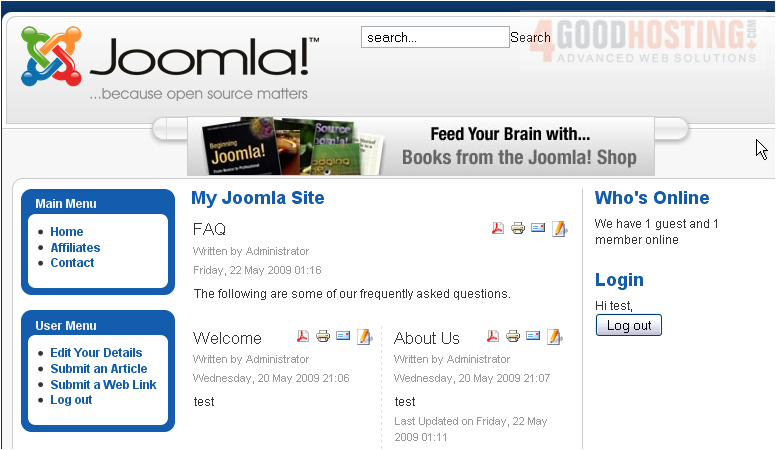
Our menu is now complete! Let's check it out on the frontend
Â
Everything seems to be in order. The User Menu is ready to be used!

 WGS AI Assistant